
Everything You Need to Know About Cake Boards
Cake boards have a crucial part to play when it comes to making custom cakes. There are two main ways of using cake boards – baseboards and decorative boards. There are a variety of materials and thicknesses of cake boards available. The cake board must be sturdy enough to withstand the weight of the cake.
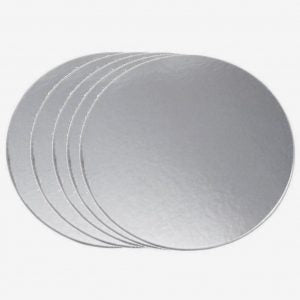
Cardboard Cake Boards
Cardboard cake boards come in a variety of shapes and sizes and are each about 3mm thick. Cardboard cake boards are usually silver or gold in colour. Cardboard cake boards or STD cake boards are used under each cake tier for a support. They could also be used as a display boards, but only for a smaller and lighter cakes.
Baseboards are useful when decorating and moving cakes, which is why you need to use one under each cake tier. If you don’t use cake board under your cake, there is a high change that when you move the cake around, it will crack and ruin your cake. It’s also easier and cleaner to move the cake with the added cardboard cake board.
Your support cake board is always the same size as your cake is, so when you ganache or buttercream the cake, you ice it as though it is part of the cake.
When you make higher than 2 tier cake, it is also important to use central dowel that runs all the way from the top of the cake to the bottom decorative board.
Before putting the cake on the cardboard baseboard, you’d need to drill the holes in the middle of all the STD boards so you can slide the dowel through it when you start stacking the cakes.
You can attach several of the cardboard cake boards together to make a decorative cake base, depending on how heavy your cake will be. If you’re making a really large and heavy cake, you should use something sturdier though.
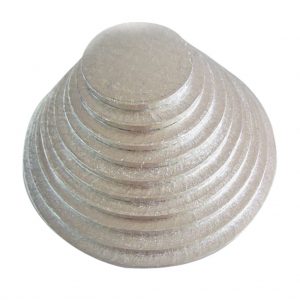
Cake Drums
Cake drums are made out of thick, corrugated cardboard or styrofoam. Cake drums are usually 6mm-10mm thick, but can also be thicker than that. Cake drums are are perfect for decorative cake boards but are usually more expensive than masonite cake boards, so they are not used as often as MDF boards are.

Masonite Cake Boards
Masonite cake boards or MDF cake boards are much more durable than cardboard cake boards. Masonite cake boards are usually about 6mm thick.
Masonite cake boards are made of compressed wood fibres and are extremely strong, which is why they are good for decorative baseboards, as they can hold the weight of the whole cake.
MDF cake boards are ideal to use for tiered cakes. When making higher than 2 tier cake, you do need a central dowel that should be screwed to the Masonite board. It is especially necessary when you need to travel with the cake. If you don’t have a central dowel, there is a high chance that the cake can move around on the
Masonite board, and on the worst case scenario the cake will either crack or completely collapse. Your decorative board should be at least 2” bigger than your cake is, ideally even more than that. Often there is no room for writing on the cake, so decorative cake board can be used as an additional decorating surface.
Masonite cake boards used to come only in simple gold or silver but you can now also buy patterned ones in different colours. The decorative cake board that the cake sits on, should be attractive, but not to detract from the cake. There is nothing worse than having amazingly beautiful cake sitting on a naked cake board.
So decorating your Masonite board is just as important as decorating the whole cake. Your decorative cake board should be in similar colours as your cake is, or if not in similar colours, at least in same style as your cake. There are couple of ways to decorate Masonite cake board.
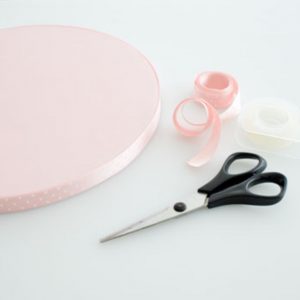
Covering Masonite Cake Board With Fondant
We decorate all of our Masonite boards with rolled fondant. Fondant covered cake board allows the design of the cake to be harmonised from top to bottom.
You’d need to cover the cake board at least couple of days ahead of time, to allow the fondant to harden, so it will not get damaged when setting the cake on the board. Brush water or edible glue over the entire surface of the cake board (did you know you can make your own, edible glue with simply adding water to the Tylose powder).
Knead and soften the fondant, dust your work area with cornflour or icing sugar and roll out the fondant. Place the fondant on your MDF board, and cut off the excess. You can also texture the fondant with embossing tools, to add some extra details to it.
And most importantly, don’t forget to use a ribbon, to finish decorating the cake board!!!
Cakers tip: Good quality fondant can be fairly expensive. Often your decorative cake boards are 14” wide or even bigger than that, and will take large amount of fondant to cover. To save some money and fondant, we do recommend that you cut out a hole from a fondant, that is the size of the cake, so you only cover the mdf board that is actually visible.
Covering Masonite Cake Board With Foil Or Adhesive Wrap
Covering the Masonite cake board with cake foil or adhesive wrap can add a touch of a colour and finish your cake nicely. Cake foils and adhesive wraps come in different colours and patterns, so there’s something that suits every cake.
Stacking Cakes
I’ve mentioned couple of times that when stacking the cakes, support is very very important. Failing to do so, and you risk having cracked or collapsed cake. Cakes should never ever be stacked on top of each other without proper support.
There has to be cardboard cake board, under each tier of the cake, even when it’s only 1 or 2 tier cake. I do also recommend dowels for 2 tier cakes, anything more than 2 tiers and it is 100% must and not a suggestion.
Prepare your decorative baseboard. Attach the central dowel, if your cake is +2 tiers. The central dowel should not just be pushed through all the cakes; it should actually be screwed to the bottom of the Masonite cake board.
Make sure you’ve drilled the holes to the cardboard cake boards, before you put the cake on it. Slide your first cake through the dowel, making sure you add some melted chocolate or icing under the cake, so it will stick to the Masonite cake board. Insert the dowels into the cake; making sure it will hit the cake board that’s underneath the cake.
Mark the height of the cake on a dowel and remove it. Your dowels should be just slightly shorter than the actual cake. Cut your dowels all to the same height and place them back into the cake. You need at least 4 dowels per one cake tier.
Larger cakes require several more than four dowels. Spread some icing or melted chocolate on the centre of the cake and place the top tier on.
Cakers tip: There are special wooden dowel rods available for cake stacking. They can get expensive, if you need to use a lot, and you need a saw to cut them. You can also use, extra thick plastic jumbo straws.
They look as it they won’t be able to hold any weight, but amazingly they work really well. That’s what I use on all of my cakes now, they are much easier to handle and are cheaper as well.
So when baking and decorating your next cake, remember, you do need variety of cake boards to finish your project successfully. It is better to be safe, just in case, then lose an entire cake because it collapsed!
Cakers tip: Completed cakes can be very large and heavy, so they can be tricky to move around. It’s a good idea to glue “feet” on the bottom of your decorative cake board, so you can get fingers under the cake board for ease in moving the cake.
We usually use small rubber doorstoppers, so the cake won’t slide on the table, but you can use chunks of wood, or any other material on hand. The “feet” should be about 1.3cm tall so you have just enough room for fingers to slide underneath the board without sacrificing the appearance of the cake.
If your base cake board is very large, you should add an extra “foot” under the centre of the cake board as well.
